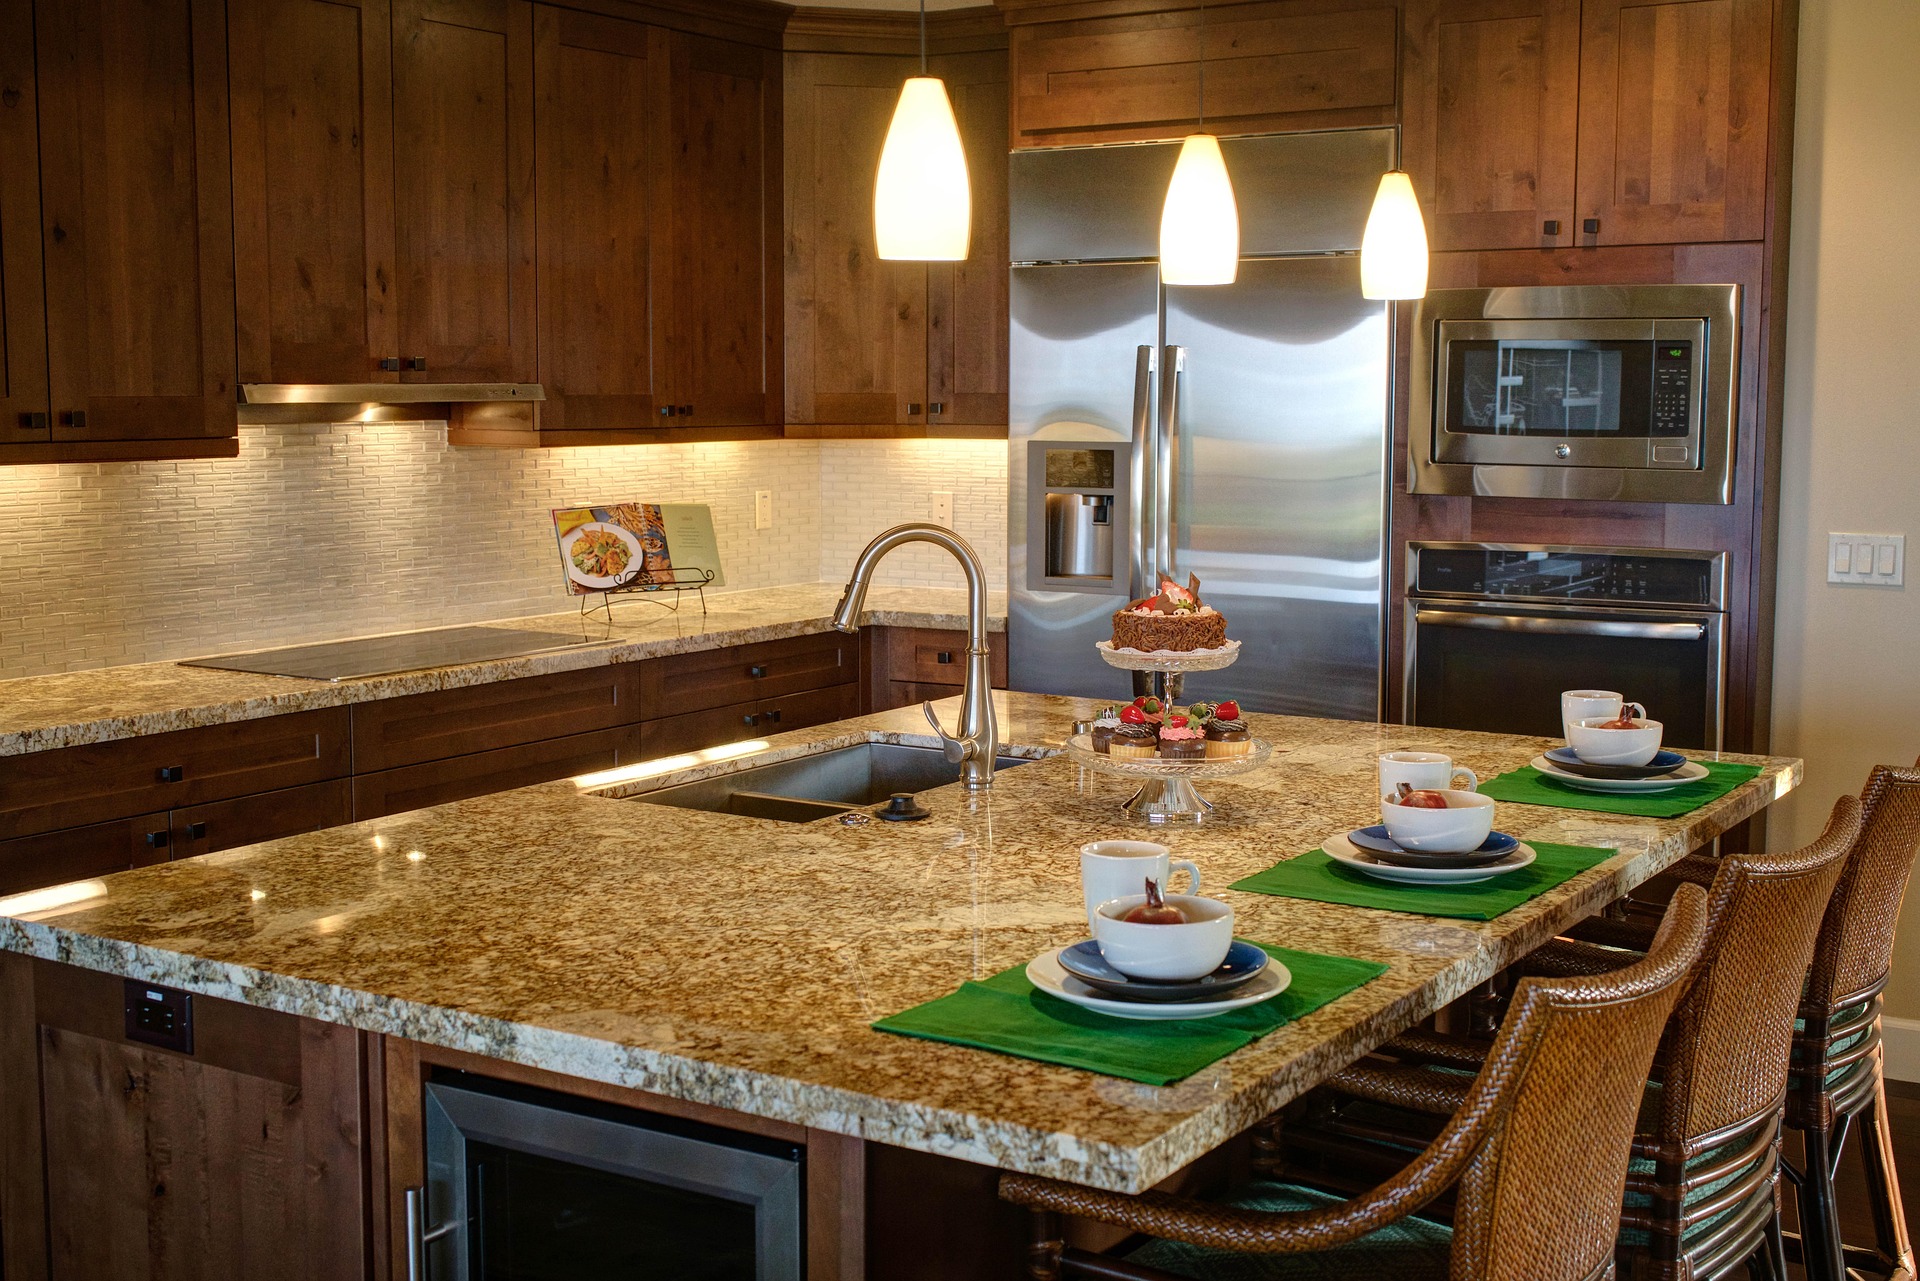
A kitchen can have attractive cabinets, a good countertop, and expensive-looking hardware and still feel uncomfortable after sunset. The usual problem is not that the room needs one extremely bright fixture. It is that one light source is being asked to illuminate the whole room, the work surfaces, and the evening atmosphere at the same time.
A better approach is to give each lighting job its own layer. Ambient light provides general illumination, task light reaches the surfaces where you work, and accent light adds depth and a softer evening setting. You do not necessarily need to install all three at once, and you should not assume every kitchen needs the same number of fixtures. Start by observing where the room actually fails.
Start With a Five-Minute Lighting Audit
Before buying bulbs or fixtures, stand in the kitchen after dark and switch on the lights you normally use. Then work through the room as if you were preparing dinner. Look for five things:
- Worktop shadows: Stand at the main preparation counter. Does your head or upper body block the light? If yes, the problem is probably light position rather than simply insufficient brightness.
- Dark edges: Look at corners, tall cabinets, and the floor near the perimeter. If these areas disappear visually, your general lighting may be too concentrated in the center.
- Glare: Look toward the fixture from normal working positions. Exposed bright LEDs or poorly shielded lamps can be uncomfortable even when the counter itself is well lit.
- Uneven color: Check whether one group of bulbs looks noticeably bluer or yellower than another.
- Evening mood: After cooking is finished, can you lower the intensity or leave a softer light on without keeping the entire kitchen fully illuminated?
This audit tells you which layer deserves attention first. It also prevents the common mistake of buying another bright ceiling fixture when the real problem is a dark worktop.
Layer 1: Ambient Light for the Whole Room
Ambient lighting is the background illumination that lets you move around the kitchen comfortably. A central flush-mount fixture can work well in a compact room, but its location matters. A single fixture directly in the middle may leave the counters beside the walls comparatively dark, especially when a person stands between the fixture and the work surface.
For an existing kitchen, compare three practical approaches:
| Situation | Possible improvement | What to check |
|---|---|---|
| Small kitchen with one dated fixture | Modern flush-mount LED | Fixture size, ceiling box compatibility, brightness and dimming |
| Larger room with several dark areas | Multiple ceiling fixtures | Spacing, ceiling structure and electrician requirements |
| Existing fixture is adequate but feels harsh | Add task and accent layers | Dimming compatibility and bulb temperature |
Do not choose a fixture by wattage alone. LED products vary in light output, beam distribution, color rendering, and dimming compatibility. Check the manufacturer’s specifications and make sure the fixture is suitable for the existing electrical setup.
If replacing a hard-wired ceiling fixture, turn off power at the appropriate breaker and follow the manufacturer’s installation instructions. If you are not qualified to work on household wiring, use an electrician rather than treating a fixture swap as a guaranteed DIY job.
Layer 2: Task Lighting for the Work Zones
Task lighting is usually the most useful improvement because kitchen work happens at the counter, sink, stove, and island—not in the middle of the room. Walk through your main work areas one at a time. For each area, ask: Where is the light coming from when I am standing here?
Under-cabinet lighting is particularly useful along counters beneath wall cabinets. The best position depends on the fixture design, but the goal is to illuminate the work surface rather than shine directly into your eyes. A continuous strip or a series of evenly spaced fixtures can reduce the bright-and-dark pattern created by a single small puck light.
For the sink, check whether your upper cabinets or your own body create a shadow. For a range or cooktop, use the hood’s built-in lighting if it provides adequate coverage, while following the appliance manufacturer’s requirements.
A Simple Work-Zone Test
Place a cutting board at your usual preparation position. Stand where you normally stand and hold your hands over the board. If your hands and the board fall into shadow, move the light source forward or add task lighting. This simple test is more useful than choosing a fixture based on appearance alone.

Choosing the Right LED Strip for Cabinets
LED strips are useful because they can fit beneath upper cabinets or, where appropriate, above cabinets for indirect light. Before purchasing, check:
- Length: Measure the actual run instead of estimating from cabinet count.
- Power: Confirm the strip and power supply are correctly matched.
- Switching: Decide whether you want a wall switch, inline control, remote, or smart control.
- Diffusion: A diffuser can make individual LED points less visually harsh.
- Color temperature: Match the rest of the kitchen or deliberately create a separate accent layer.
- Heat and moisture: Follow the product’s placement rating rather than assuming any strip is suitable near a sink or cooking appliance.
For a 72-inch cabinet run, measure the usable mounting area first. A 72-inch strip is not automatically the right purchase if the cabinet has breaks, corners, or sections where the light cannot be installed.
Layer 3: Accent Lighting for Evening Atmosphere
Accent lighting is the least necessary for food preparation, but it can make a large difference after the kitchen becomes a social space rather than a work area. Useful locations include the top of cabinets, inside suitable glass-front cabinetry, beneath an island overhang, or on a small open shelf. The light should support the room rather than become the focal point itself.
Above-cabinet lighting works particularly well when the cabinet-to-ceiling gap allows the light source to remain hidden from normal sightlines. Measure that gap before buying anything and make sure the chosen product has a safe place for its power supply. The aim is not maximum brightness. Accent lighting generally works best when it is softer than the main working lights.
Pendant Lights: Measure the Island Before You Shop
Pendants are both functional fixtures and visual elements, so size and placement matter. For a kitchen island or table, a useful starting point is to keep the bottom of the pendant approximately 75–90 cm (30–36 inches) above the surface. Treat this as a starting range, not a universal rule. Ceiling height, pendant size, sightlines, and the height of the people using the room can change the final position.
Before drilling or installing a ceiling fixture, mark the proposed locations temporarily. From the normal standing and sitting positions, check whether the pendants obstruct sightlines or feel too low. For a long island, two or three smaller pendants can distribute light more evenly than one fixture, but spacing should follow the actual island dimensions. A 60-inch island and a 96-inch island should not use the same spacing simply because both are described as “standard islands.”
Color Temperature: Choose for the Whole Kitchen
Color temperature is measured in Kelvin (K). Lower numbers generally appear warmer, while higher numbers appear cooler. A practical home-kitchen range is often around 2700K–4000K, depending on the room, finishes, daylight, and personal preference. Around 2700K can create a warm evening feel; around 3000K is a common middle ground; higher temperatures can appear crisper and may suit some task-focused spaces.
There is no single temperature that is correct for every kitchen. Instead, look at the surfaces you already have. Very warm light can change the appearance of white cabinets or cool-toned countertops, while mixing noticeably different temperatures can make adjacent areas look disconnected.
If you are replacing several bulbs, buy one sample first. Test it at night with the actual cabinet and countertop colors before purchasing a full set.
Dimmers and Smart Bulbs: Make the Same Room More Flexible
A kitchen often needs different light levels throughout the day. Full task lighting makes sense while chopping and cooking. A lower level may be more comfortable during dinner or conversation.
If your existing wiring supports a compatible dimmer, dimming can make the lighting system more flexible. However, not every LED bulb or fixture works with every dimmer, so check compatibility before buying.
Smart bulbs can provide another option for compatible lamps and fixtures. They can be useful when you want separate scenes such as “cooking,” “dinner,” and “late evening.” They are not a substitute for properly positioned task lighting, though; changing brightness cannot correct a work surface that is illuminated from the wrong direction.

Three Upgrade Paths
You do not need to renovate the entire lighting system in one weekend.
Budget refresh: Replace outdated bulbs with compatible LEDs, standardize the color temperature, and add one well-positioned task light where the worst shadow occurs.
Mid-level refresh: Improve the main ceiling fixture, add under-cabinet task lighting, and put the main layer on a compatible dimmer if practical.
Full layered plan: Use distributed ambient lighting, dedicated task lighting at the major work zones, pendant lighting where appropriate, and a subtle accent layer for evenings.
The right choice depends on the existing wiring, ceiling, cabinet layout, budget, and whether you own or rent the property.
A Worked Example: 10 × 12-Foot Kitchen
Imagine a 10 × 12-foot kitchen with one ceiling fixture, a 72-inch counter beneath upper cabinets, a sink on a side wall, and a small island. The audit shows three problems: the preparation counter is shadowed, the sink is dim, and the room feels too bright after dinner. A sensible sequence would be:
- Keep or replace the central fixture depending on whether it provides acceptable general coverage.
- Install a correctly sized under-cabinet task light over the 72-inch preparation run.
- Improve the sink area only if the existing light remains inadequate.
- Add two appropriately sized pendants over the island if the ceiling and electrical setup allow them.
- Add a low-level accent strip above the cabinets or another suitable location.
- Put the appropriate layers on separate controls where possible.
This solves specific problems instead of simply adding more total light.
When a Lighting Upgrade Needs a Professional
Use an electrician for work involving new wiring, moving electrical boxes, adding hard-wired fixtures, modifying circuits, or anything you are not qualified to perform safely. For rented homes, check the lease and obtain the required permission before altering electrical fixtures. Also pay attention to moisture and heat. Fixtures and strips placed near sinks, cooktops, ovens, or other demanding locations should be rated and installed according to the manufacturer’s instructions.
Final Kitchen Lighting Checklist
Before buying anything, confirm:
- I know which work surfaces are actually too dark.
- I have checked where my body creates shadows.
- I measured the cabinet or island rather than guessing fixture size.
- I know the color temperature of my existing bulbs.
- I checked LED/dimmer compatibility before buying a dimmer.
- I checked the product’s length, power, and placement requirements.
- Pendant height and spacing were considered from normal sightlines.
- Hard-wired electrical work will be handled safely and legally.
- Accent lighting is being used for atmosphere rather than as a replacement for task lighting.
The most effective kitchen lighting is not necessarily the brightest kitchen lighting. It is the system that puts useful light where your hands work, enough ambient light where you move, and softer illumination where you relax. Start with the problem you can see, measure before buying, and build the layers one at a time.
Disclaimer: Glimerz is a participant in the Amazon Services LLC Associates Program, an affiliate advertising program designed to provide a means for sites to earn advertising fees by advertising and linking to Amazon.com. When you click certain product links in this post and make a qualifying purchase, we may earn a small commission at no additional cost to you. We only recommend products we believe add genuine value to our readers.

